How to create RDP based SSRS report in customized model Dynamics 365 for Operations
Problem statement:
- Customer account.
- Report display: Show the list of all sales order details in report for the selected customer. (Report fields: SalesID, Sales amount, Sales order status, Sales type, Release status)
Resolution:
- Create RDP based SSRS report from Visual studio.
RDP Based Report:
- In Dynamics 365 Finance and operations, Report Data Provider is used to access and process data for a SSRS report. In this report we need to create a temporary table to execute a large number of records at run time. RDP based reports leads to complex, more control on queries and conditionally to add or remove data and also it is much extensible.
How to create RDP based Report:
- Create contract class.
- Create DP class.
- Create an Output Menu Item.
- Create Menu.
Notes:
Parameter
CustAccount
Detailed step by step explanation of the resolution
Steps For Creating RDP Based Report:
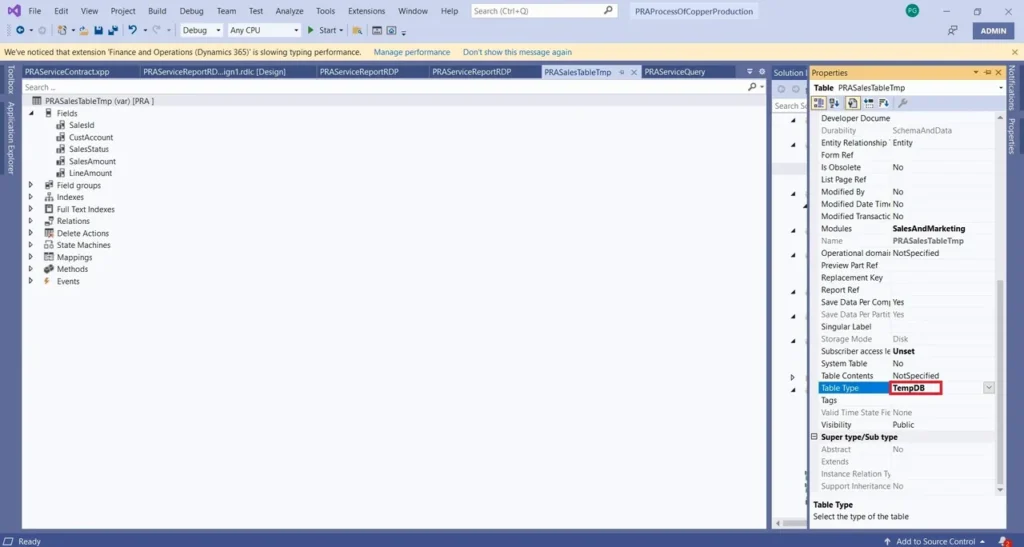
Create Temporary table: Create table with Table Type TempDB. TempDB is nothing but temporary table which showing the data at run time and it will not be storing the data. Temporary table leads to large number of data will be executed in Reports.
- Create Contract Class: Go to Solution Explorer then right click on your Project -> Add New Item under Dynamics 365 Items -> Code -> Class. Class Name Should be suffixed with ‘Contract’(PRASalesTableContract).
- The contract class will be having parm method, which is used to hold the parameter value from the front end where the user can input the data.
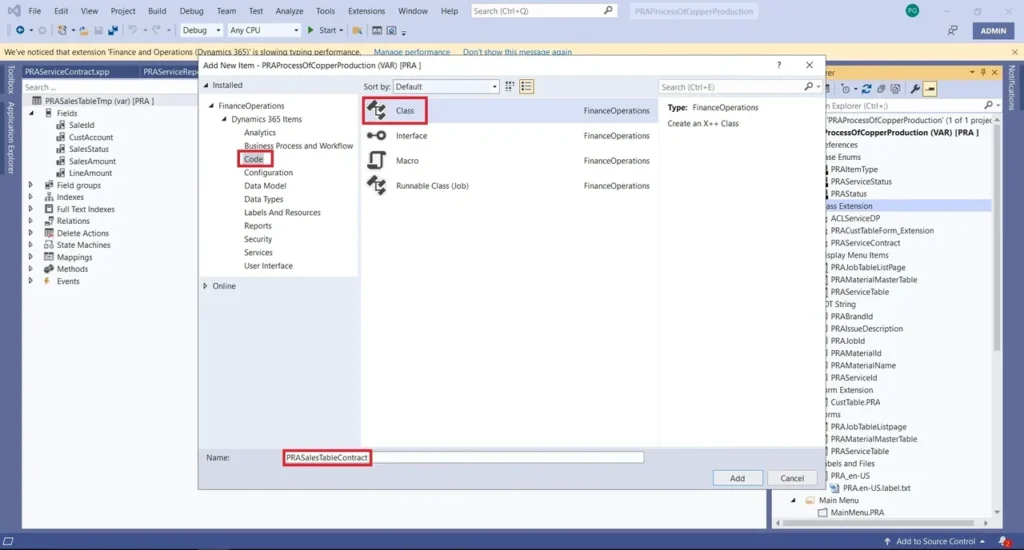
Code to create Contract Class: Create new class with suffix ‘Contract’ (PRASalesTableContract). CustAccount are the parm method where the user can input the value.
[DataContractAttribute]

class PRASalesTableContract

{

CustAccount custAccount;

[DataMemberAttribute('custAccount')]

public CustAccount parmCustAccount(CustAccount _custAccount = custAccount)

{

custAccount = _custAccount;

return custAccount;

}
Create DP Class: Go to Solution Explorer then right click on your Project -> Add New Item
->Dynamics 365 Items -> Code -> Class. Class Name Should be suffixed with ‘DP’(PRASalesTableDP).
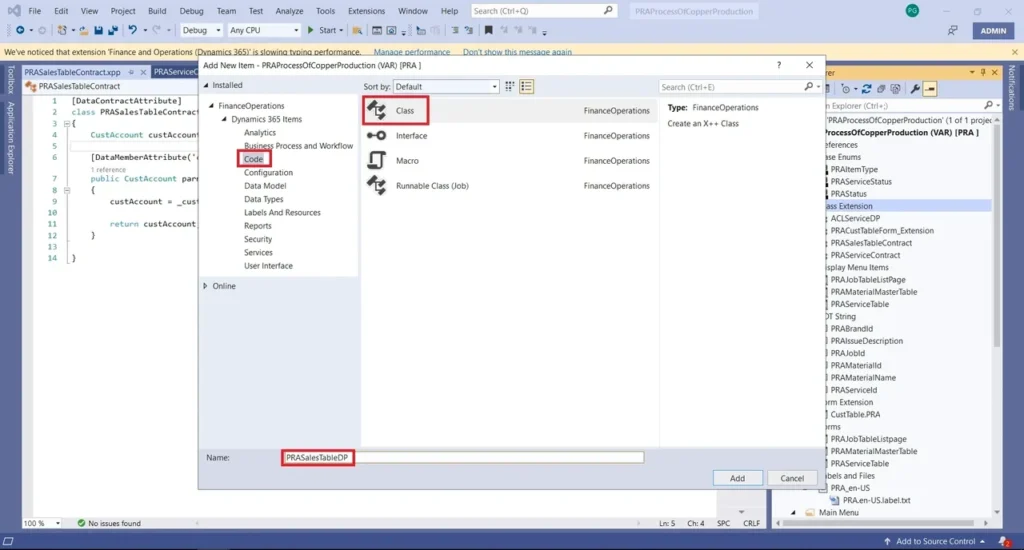
DP class should be extended with SRSReportDataProviderBase. This tells AX that this class will be used by reporting services to process the data.
This class contains two methods
- Get Data – Select and return the temporary table
- processReport – to override the business logic.
After completed build the project in Solution Explorer.
[SrsReportParameterAttribute(classStr(PRASalesTableContract))]

class  PRASalesTableDP extends SRSReportDataProviderBase

{

PRASalesTableTmp praSalesTableTmp; //Table Buffer

///

/// Select and Return a temporary table.

///

/// PRASalesTableTmp

[SrsReportDataSetAttribute(‘PRAServiceTableTmp’)]

public PRASalesTableTmp GetData()

{

select praSalesTableTmp;

return praSalesTableTmp;

}

///

/// 1) Below Override method to call contract class.

/// 2) Loop through the sales table record with   CustAccount.

/// 3) Populate the required field in temporary   table from sales table.

///

public void processReport()

{

PRASalesTableContract contract = this.parmDataContract();

CustAccount custAccount =   contract.parmCustAccount();

SalesTable salesTable; // Table Buffer

while select salesTable

where salesTable.CustAccount == custAccount

{

praSalesTableTmp.SalesId = salesTable.SalesId;

praSalesTableTmp.SalesStatus = salesTable.SalesStatus;

praSalesTableTmp.LineAmount = salesTable.getTotalLineAmount();

praSalesTableTmp.SalesType = salesTable.SalesType;

praSalesTableTmp.ReleaseStatus = salesTable.ReleaseStatus;

praSalesTableTmp.insert();

}

}

}
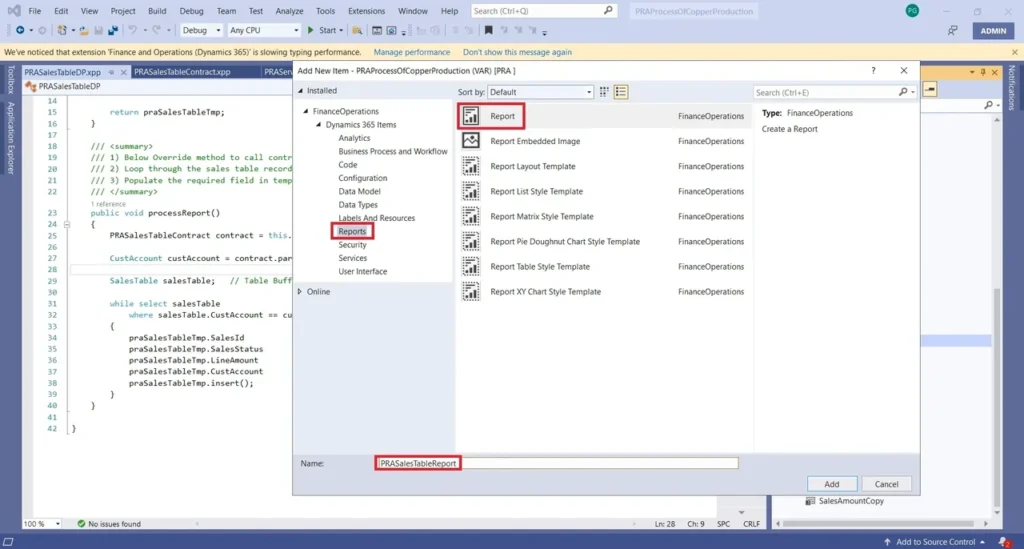
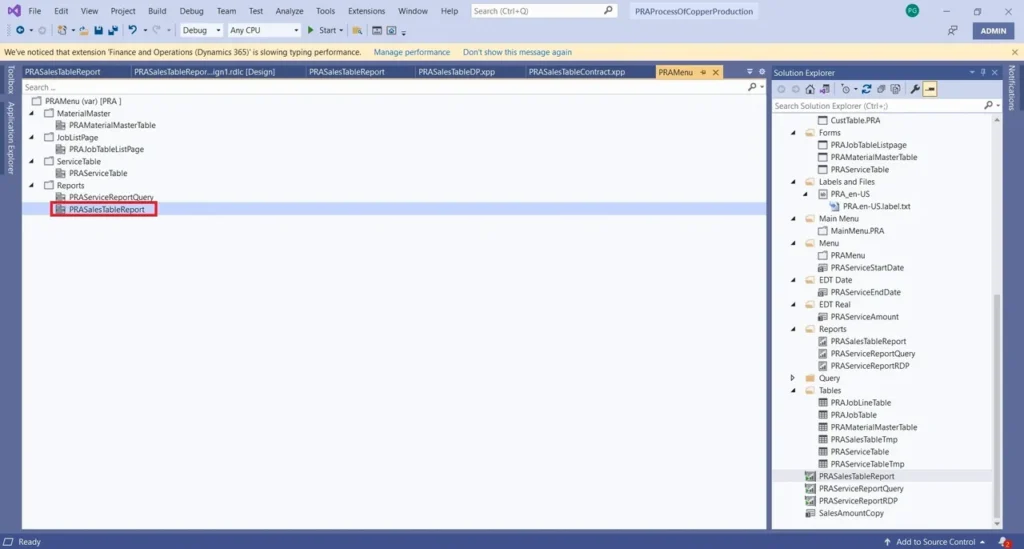
Create SSRS Report: Go to Solution Explorer -> Add New Item under Dynamics 365 -> Reports -> Report (PRASalesTableReport).
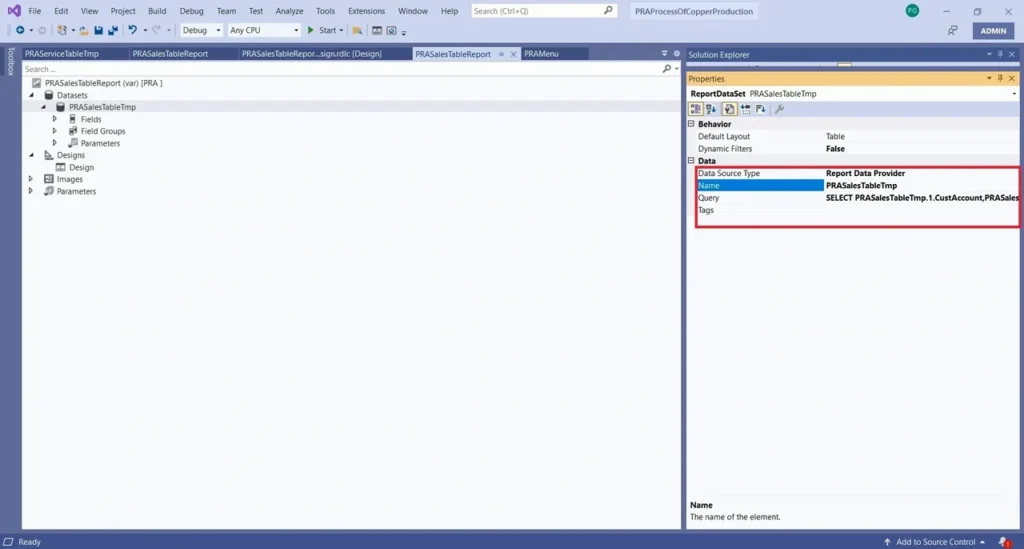
After creating a report, right click the Datasets and create new DataSets and rename it as “PRASalesTmp” then right click DS then go to properties and Dropdown the ‘Data Source Type’ to select a “Report Data Provider” and also select a required Fields in the ‘Query’ of “PRASalesTableTmp” Properties.
There are two types of designs that can be created in a SSRS report:
- Auto design
- Precision Design
we will use Precision Design
Now right click the Designs node Add >> Precision Design. A new design is added. Rename it Design. It is recommended that you set the name of the Design to either ‘Design‘ or ‘Report‘.
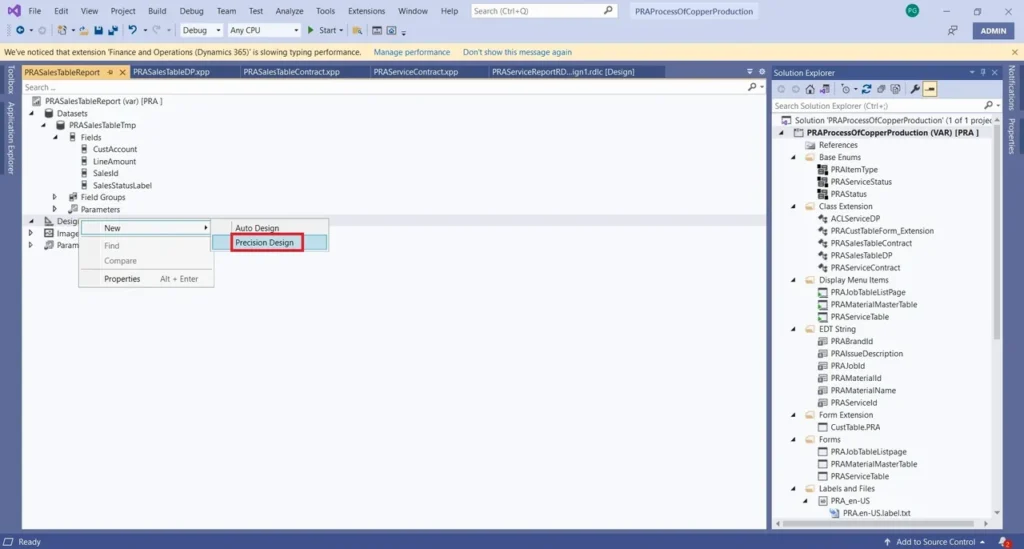
Right Click the “Designs” and create “Precision Design” and renamed as “Design” then double click to open a Report Layout.
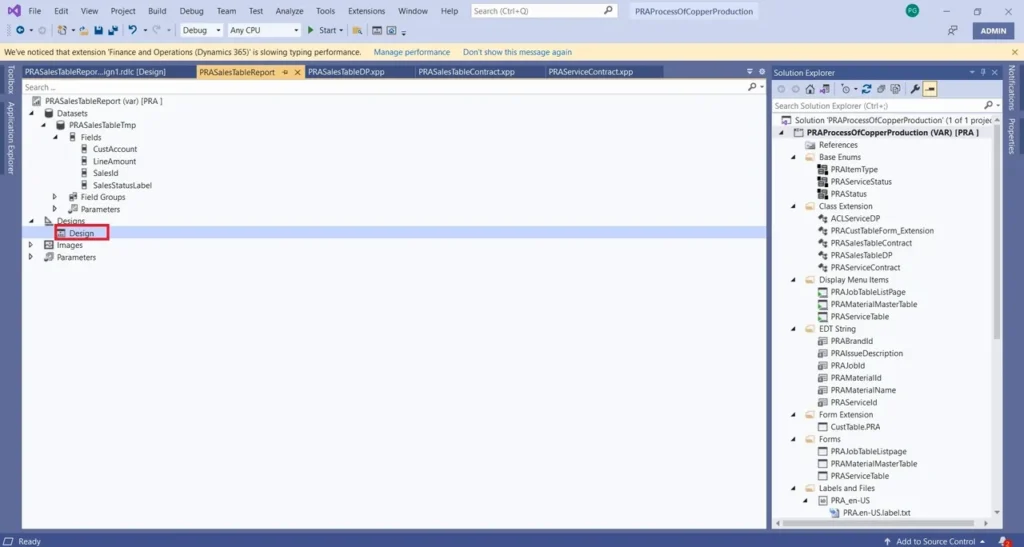
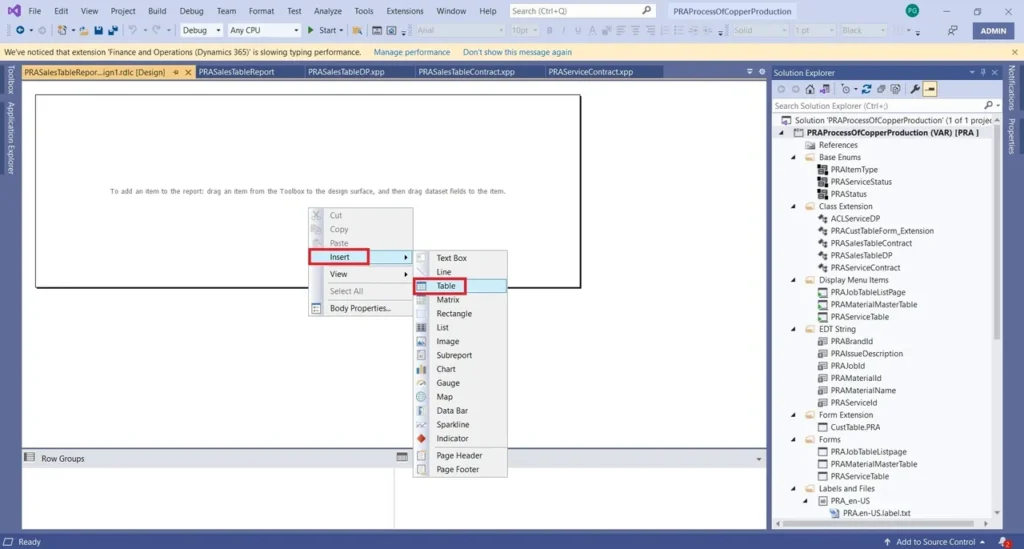
Double click the “Design” then design layout will be opened for adding data of the temporary table then right click layout -> Insert -> Table.
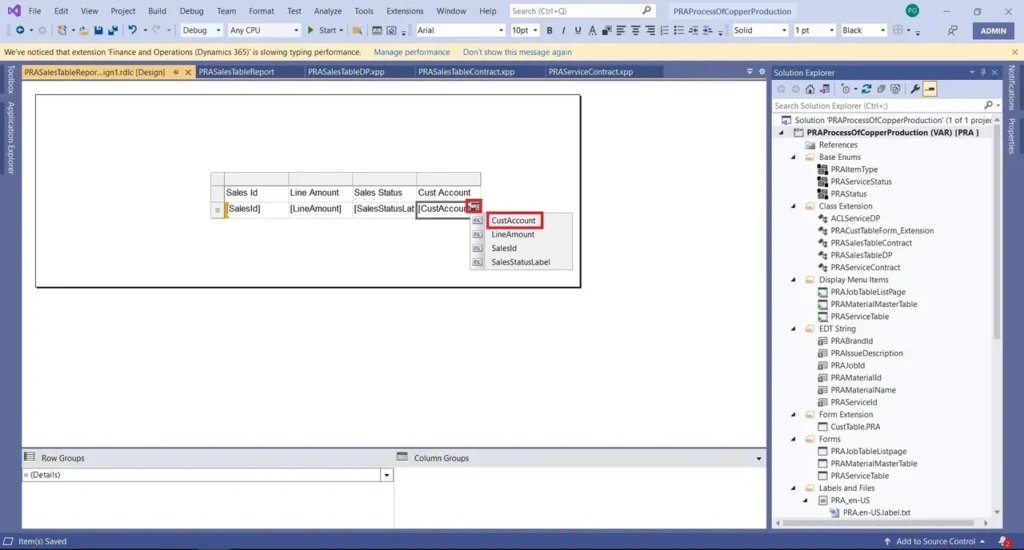
Adding Temporary table fields: adding the table fields then go to properties window -> under the “Font” Node -> FontFamily should be Sego UI and Font Size is 8Pts for heading of the fields and data field size is 7Pts and SegoUI.
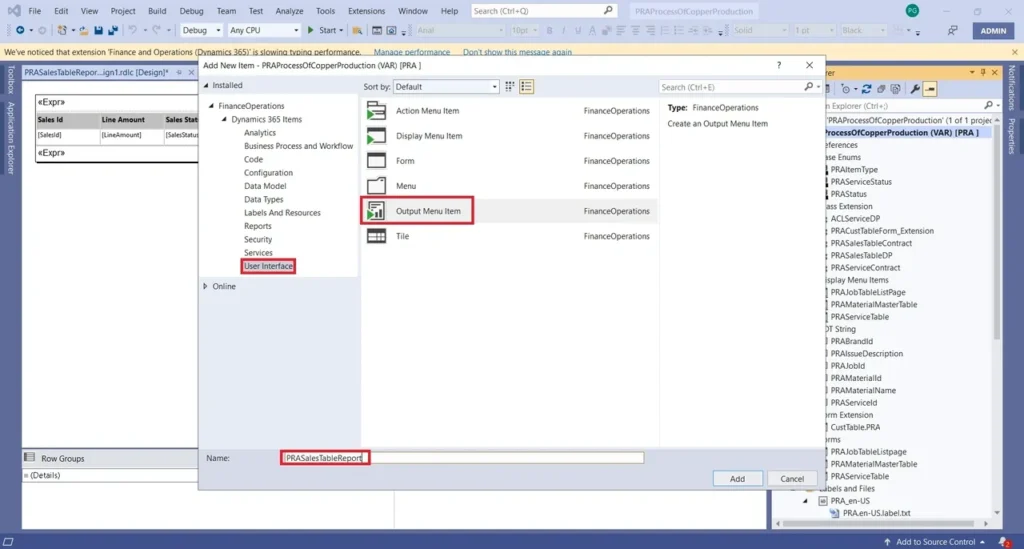
Create Output Menu Item: Go to solution explorer -> Add New Item under Dynamics 365 -> User Interface -> Click Output Menu Item then name should be Suffixed with ‘Output Menu item’ (PRASalesTableReport).
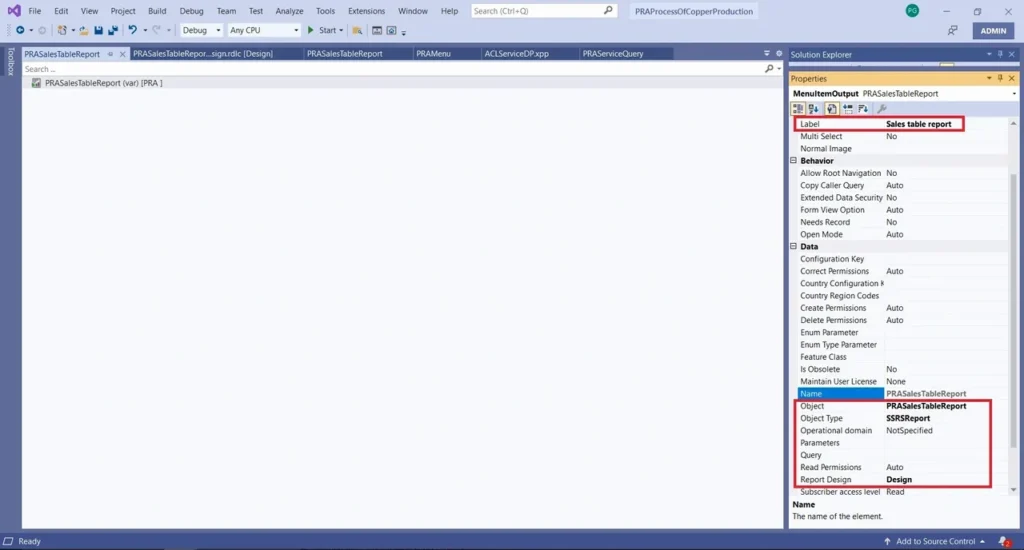
Right click the created Output Menu Item then go to properties, ‘Object Type’ should be “SSRSReport” then dropdown ‘Object’ Properties to select “PRASalesTableReport” then ‘Report Design’ Properties should be “Design”.
Output Menu Item Label: To provide a label named “Sales table Tmp report”.
Drag and drop the RDP Output Menu item in our Menu then right click the Solution Explorer to Rebuild the Model.
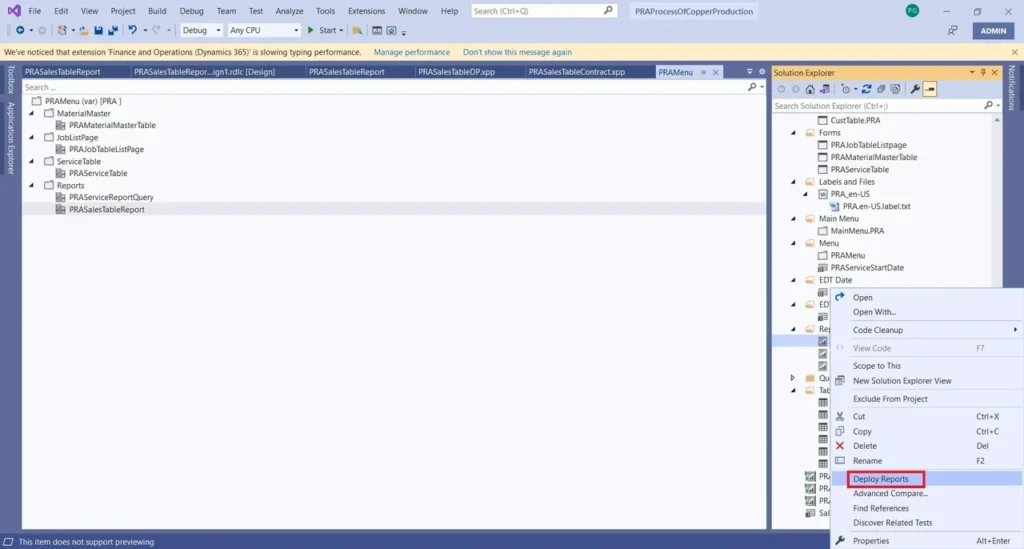
Once Build is Completed, right click the Report in Solution explorer and Deploy the report.
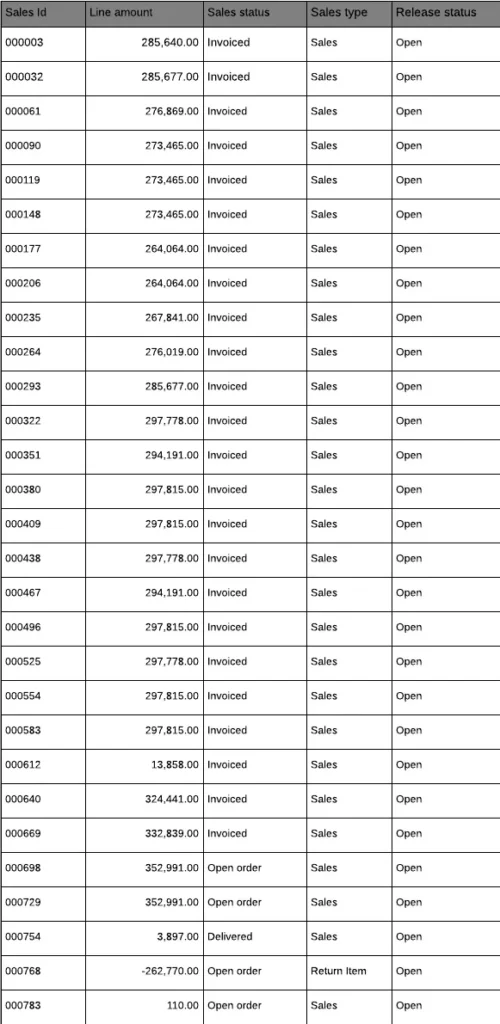
Go to Front End (UI), give the required customer account after clicking “Ok” Button then system allows to generate records from selected customer account of the particular records.
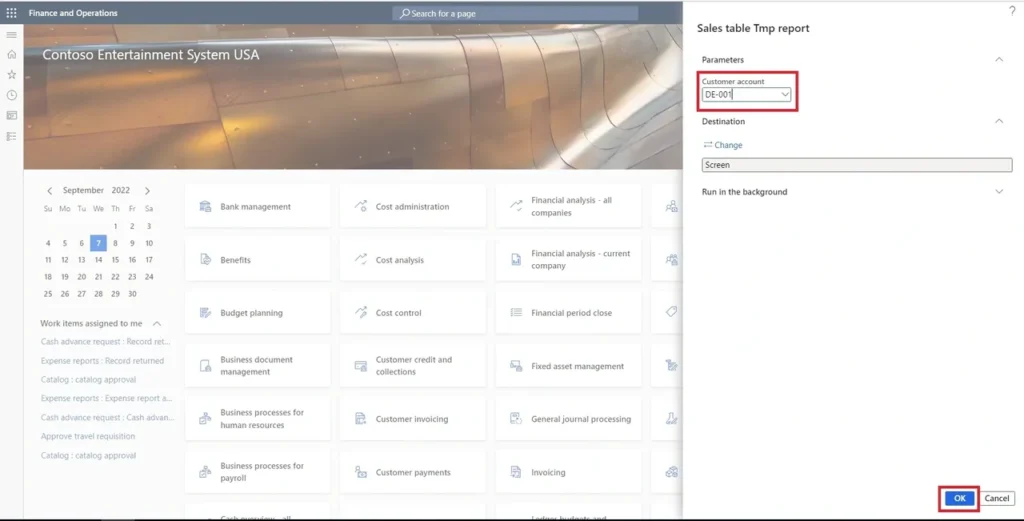
Finally, Report is generated.
PRA sales report information