If you want to access External systems or another 3rd party software or if you want to integrate
between another system to your PowerApps, we cannot always rely on Power Automate which
can queue your CRUD Operations when application and number of users grow.
High level resolution steps
So, to solve this issue we are going to use Custom Connectors, where we can connect to Cloud Servers or On-Premises servers, and these connectors can be reused across apps with custom logic and functionality.
Detailed resolution steps
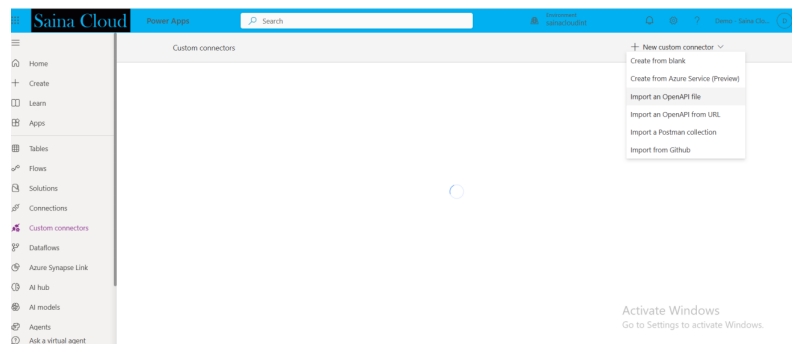
Step 1: Custom Connector will be available in PowerApps as well as Power Automate. From there
we can open the custom connector. After that select “New custom Connector” and in that select
“Create from blank”.
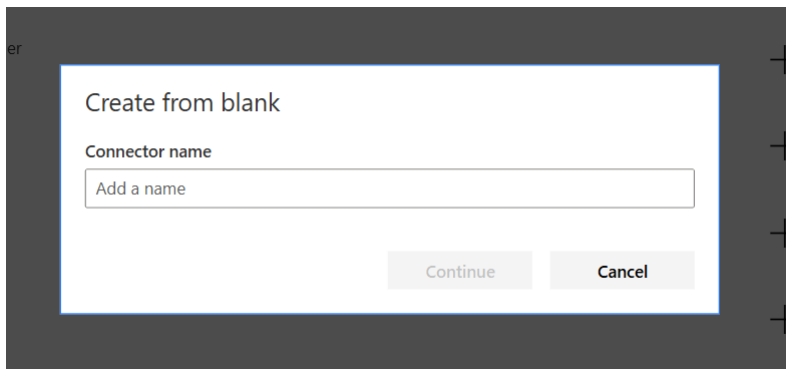
Step 2: After selecting “Create from blank” you’ll get the popup where you have to give the “Connector name”. After adding the name, the “Continue” button gets enabled.
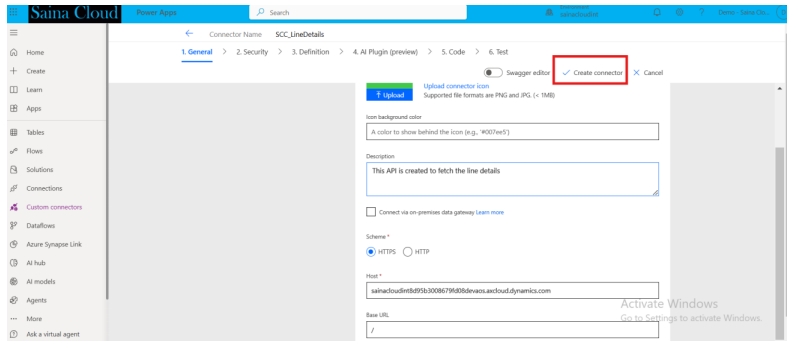
Step 3: After giving the connector name, you’ll get the screen where you have to fill out the general
description. Describe what purpose you are creating the API. And for the HOST URL – in my
case since I am connecting with D365 Finance & Operations, I am giving the F&O URL here.
In case you are using any 3rd party systems, use the target system’s HOST URL.
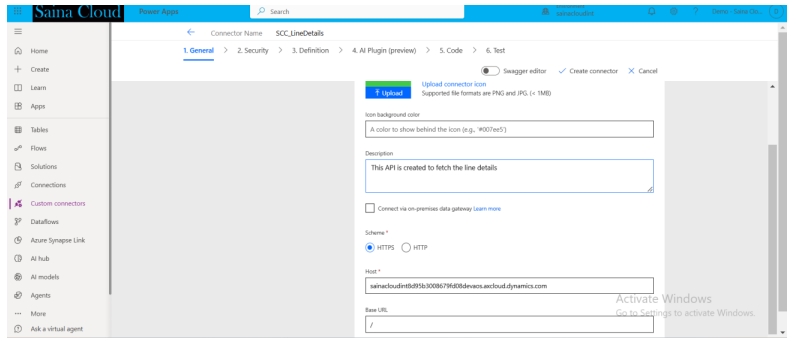
In the above image I have given the “Host” name. Make sure to use the “Host” without “https://” and
“/”
URL >> https://sainacloudint8d95b3008679fd08devaos.axcloud.dynamics.com/
Host >> sainacloudint8d95b3008679fd08devaos.axcloud.dynamics.com
After adding the information click “create connector” button as shown below.
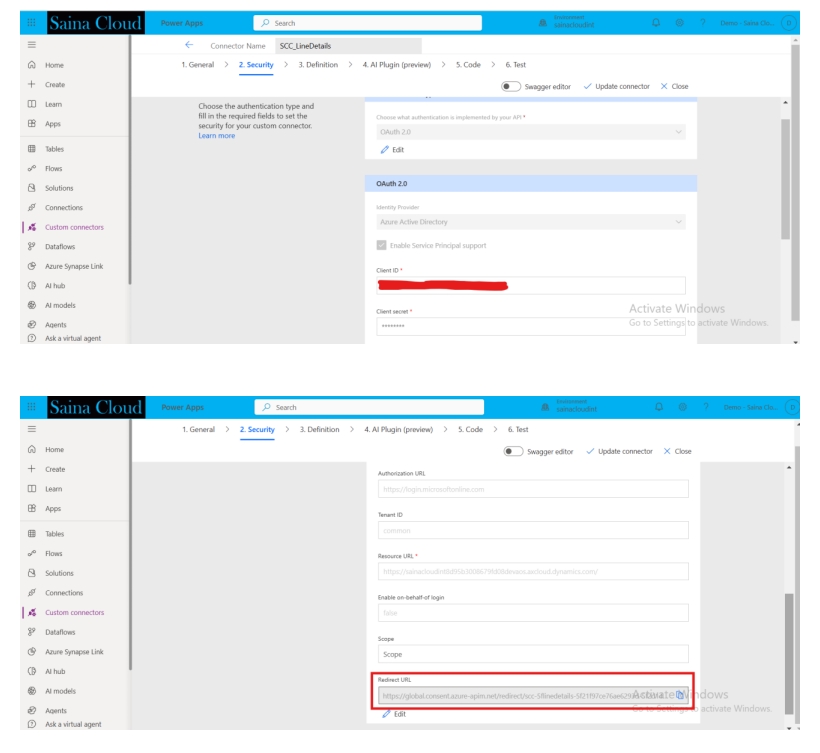
Step 4: Now go to the “Security” tab and in Authentication type select “edit” and from the drop-down
menu select the “OAuth 2.0”.
Note: A related Blog to create the Azure App registration in Azure Portal is available.
When you select “OAuth 2.0” other options will get enable. That includes Identity Provider, Client ID,
Client Secret, Tenant ID, Resource URL.
Enable the Service Principal support for authorization and application permission.
Fill in the Client ID, Client Secret, Tenant ID, and Resource URL which is related to the “Host” URL.
After filling in all the information click on the update connector which will give you the Redirect URL.
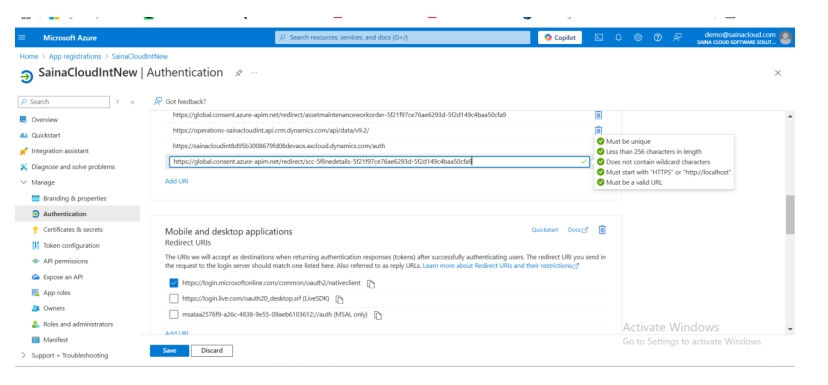
Step 5: Now after receiving the Redirect URL open the “Azure Portal” go to the “App registrations”.
Selected the App which is having the same credentials which you have mentioned in Custom Connector.
Go to Authentication and in Web Redirect URIs add the Redirect URL which you copied from custom
connector and Save
Step 6: Now In PowerApps go to the “Definition” tab and in “Action” click on New Action. You’ll get the services for adding with Request and Response option (Basically an API service that is communicating between PowerApps and Finance and Operation).
Add the “Operation ID”.
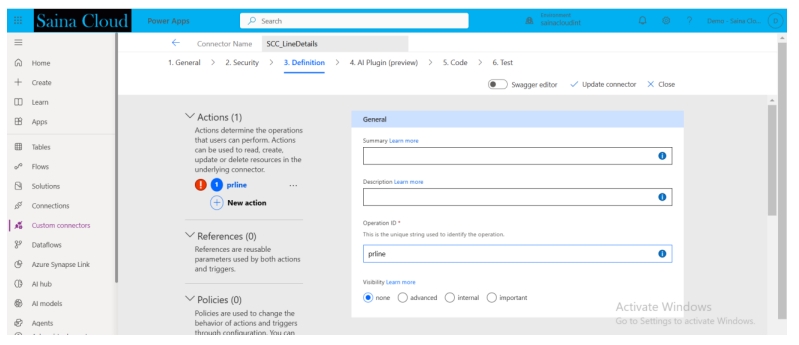
In Request click on Import from sample you’ll get the option where you have to select the service type the URL and Body
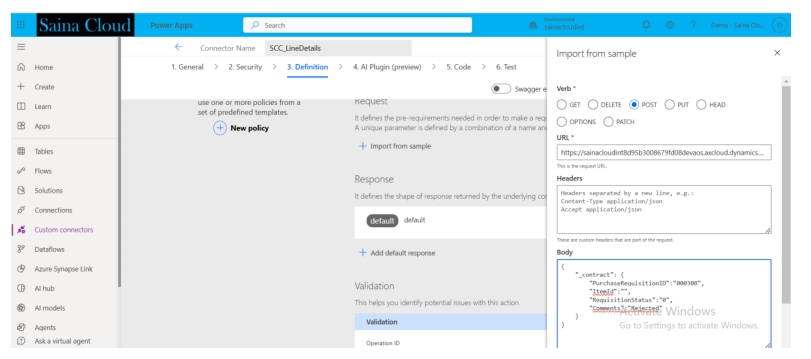
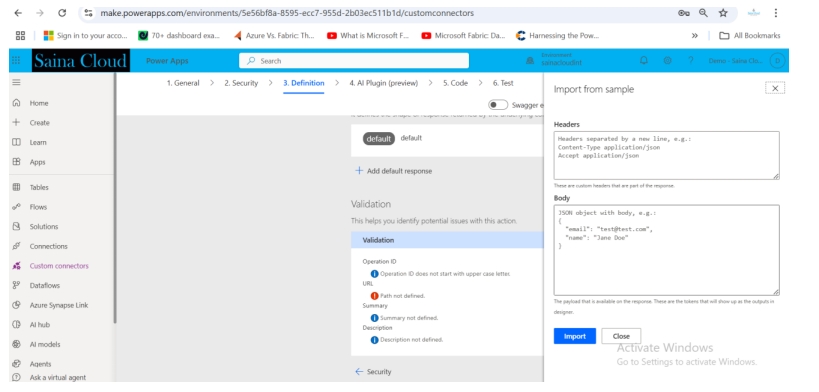
In Response add the output in the Body
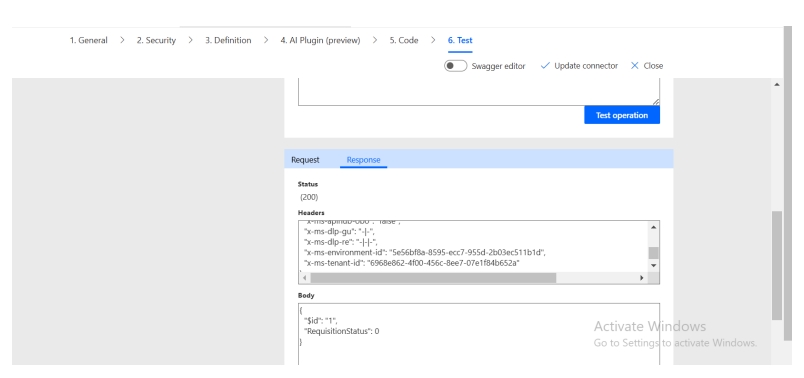
Step 7: Now after adding click on “update connector” and in the Test tab you can check the output.
Output:
We can check the result in the Test tab.
Technical Consultant – Interested in creating stunning Power BI dashboards and interest towards Power Apps applications.

