Purpose
The purpose of configuring Dynamics 365 Finance & Operations with the Excel Add-in is to enable secure and real-time interaction between Dynamics and Microsoft Excel. This integration allows users to perform data entry, updates, analysis, and bulk processing efficiently while maintaining data integrity and security.
Overview
The Excel Add-in for Dynamics 365 Finance & Operations allows users to open data directly in Excel using predefined data entities. Users can edit, publish, and refresh data without navigating between Excel and the Dynamics application.
Prerequisites
- Valid Dynamics 365 Finance & Operations user credentials
- Microsoft Excel (Desktop version)
- Access to required data entities in Dynamics 365
- Internet connectivity
Detailed resolution steps
Step 1: To configure the Excel Add-in, first open the desktop version of Microsoft Excel and sign in using the same account that you use to access Dynamics 365 Finance & Operations. This step is important because authentication is handled through your Dynamics credentials.
Once connected, you can use the Excel Add-in to perform CRUD operations — meaning you can Create, Read, Update, and Delete records directly from Excel. This allows you to manage data efficiently while maintaining real-time integration with Dynamics 365 Finance & Operations.
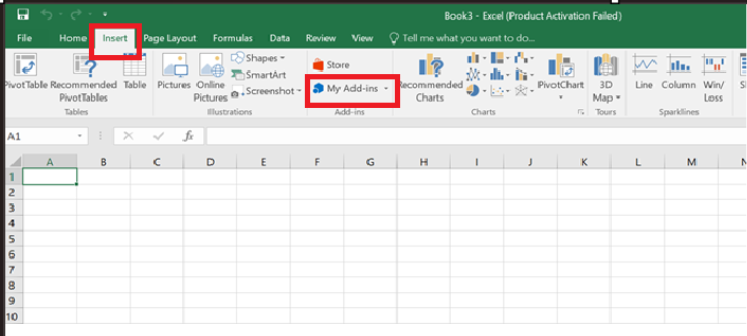
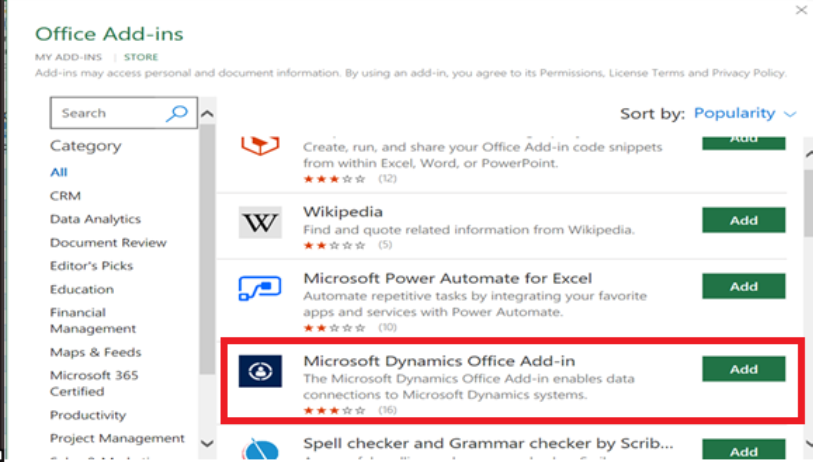
Step 2: Next, go to the Insert tab in Excel and click on Get Add-ins. In the Office Add-ins store, search for Microsoft Dynamics Office Add-in and add it to Excel
Step 3: After installing the add-in, click Add data source in the Dynamics pane and enter the Dynamics 365 Finance & Operations environment URL. Excel will then connect to the Dynamics UI and authenticate the session. Once the connection is successful, Excel is fully configured to work with Dynamics data entities.

Example Configuration
Configuring the Excel Add-in to a Form in Dynamics 365 Finance & Operations
Step 1: Create a table and form, and the respective data entity
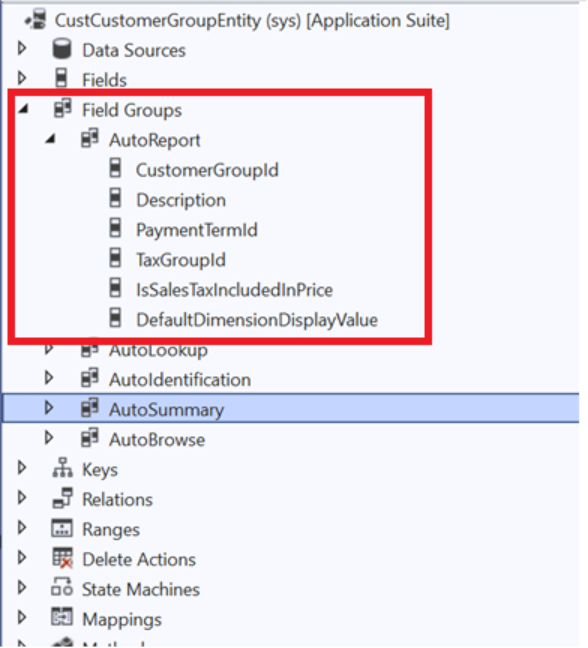
Step 2: Add only the required fields to the data entity and include those fields in the Auto Report field group. This ensures that the fields are visible when the data is opened in Excel.
If users should only view data, set the Is Read Only property of the data entity to Yes. If users need to update data from Excel, keep the entity editable.
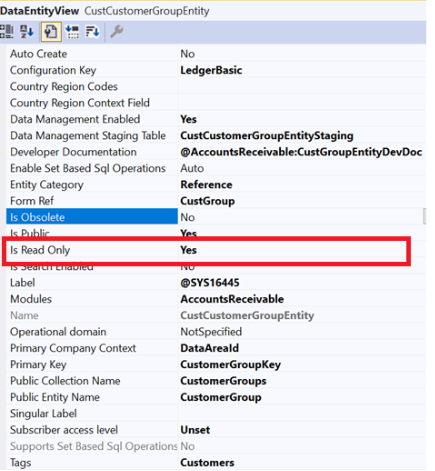
Note: If you want the data in only a readable format, set the entity is ready only properties as yes
Step3: After creating or updating the data entity, build and synchronize the project so the entity becomes available for Excel integration.
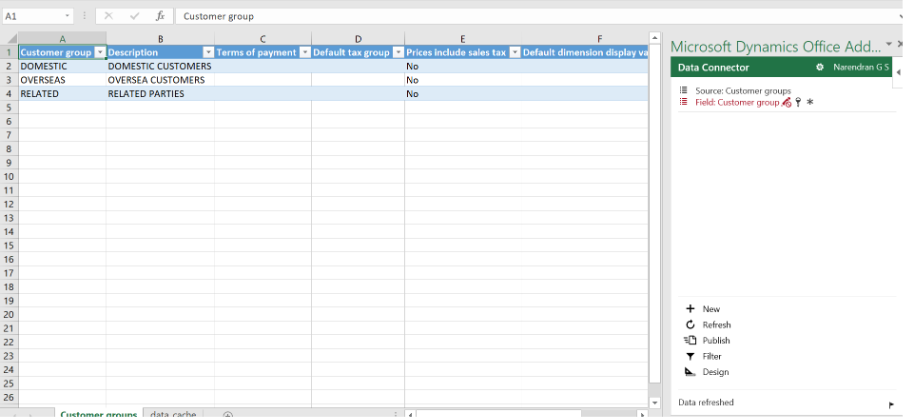
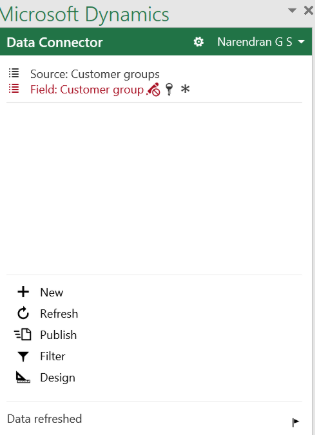
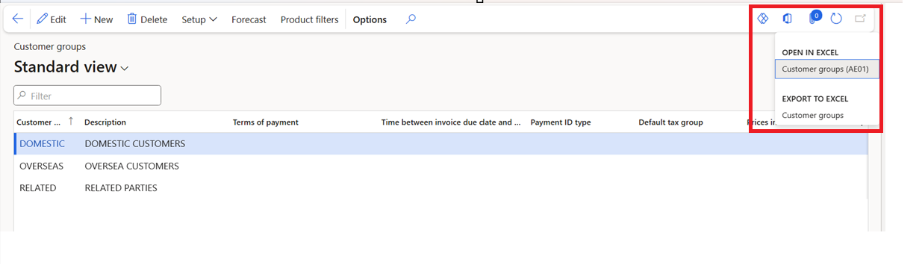
Step4: Now, open the target form in Dynamics 365 Finance & Operations. On the form toolbar, click the Office (Excel) icon. The system automatically detects the related data entity and generates an Excel template based on it. This template is downloaded to the user’s machine.
Step 5: When the Excel file is opened, the Microsoft Dynamics Office Add-in loads on the right side of Excel. The user can click Refresh to load the latest data from the form and Publish to push any changes back to Dynamics 365