How to Create and Configure App Registrations in Azure
- Web app: Create a Web app in Azure Active Directory
- Generate secret: Collect the generated client information – Client ID, Client secret, Tenant Id & can use it in a third-party application & D365
- Enable ERP: Generate a token using the GET method
Detailed Resolutions Steps
- Create a Web app:
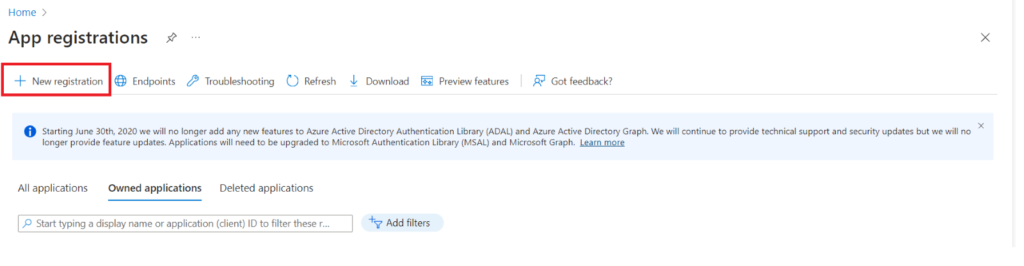
Step 1: Log in to Azure Portal -> search “App registrations” & click new
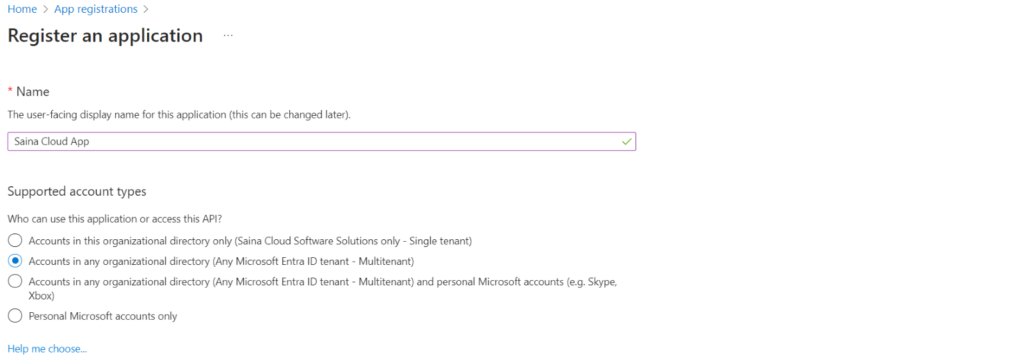
Step 2: Provide name & choose the required account types
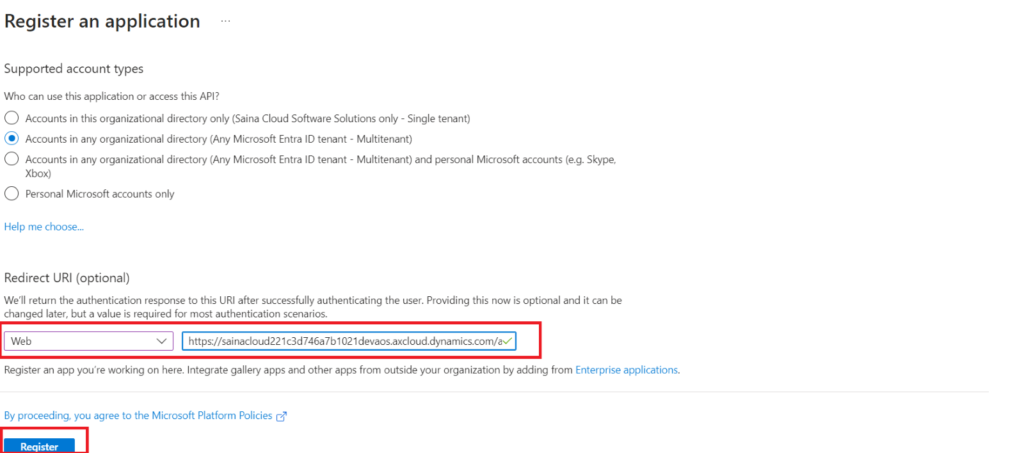
Step 3: Under URI Redirect option, select “Web” from the first dropdown field & provide the D365 “URL/auth” in the next field. Then click “Register”.
- Generate secret:
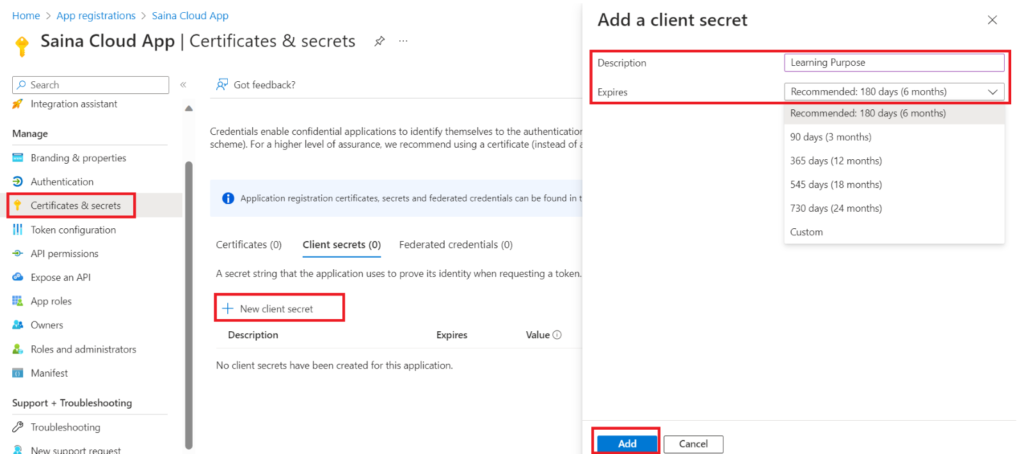
Step 1: Choose Certificates & secrets under Manage, click new client secret, provide “Description & Expires”, then click Add.
Note: custom dates are also given in the Expires field.
Step 2: New client secret ID has been generated (Copy the Secret ID from the area below)
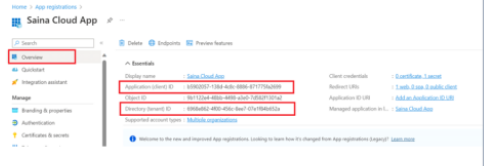
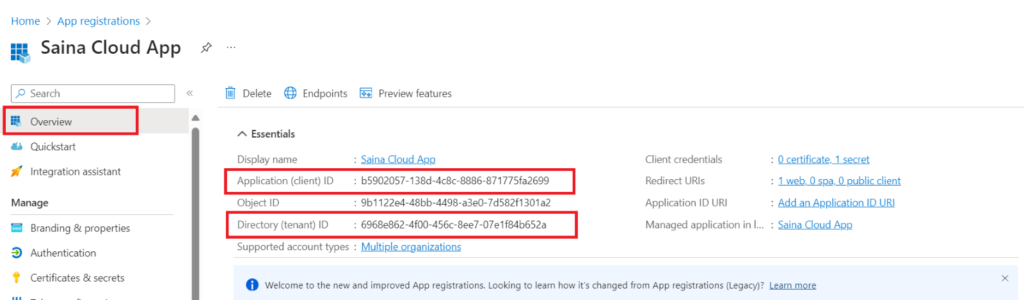
Step 3: Go to the overview & copy the Client ID & Tenant ID from the area below
- Enable ERP:
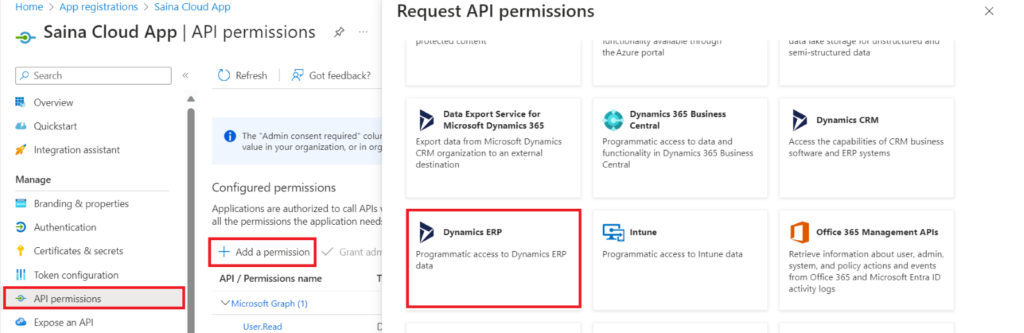
Step 1: Select API permissions under Manage -> Click “Add a permission” -> Select Dynamics ERP
Note: We can choose the required external application, here we used Dynamics ERP.
Step 2: Choose Delegate permission & select all three permissions.
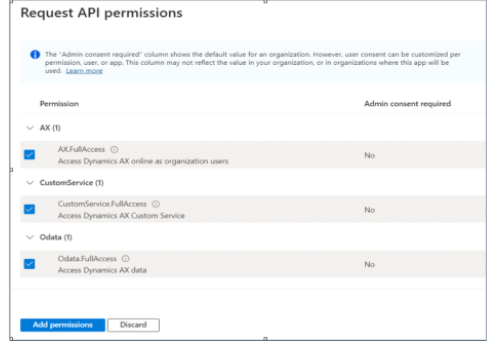
Step 3: Choose Application permission & select connector -> Add permissions.
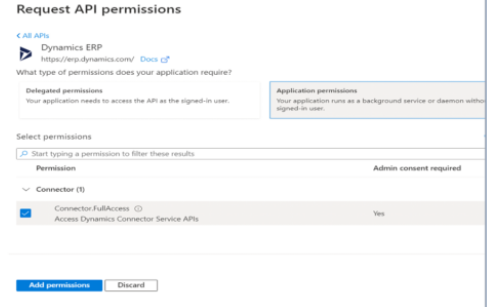
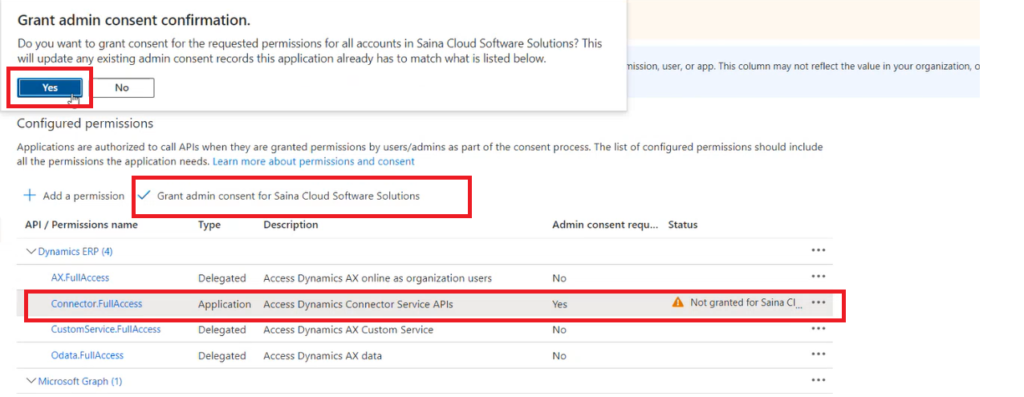
Step 4: Select “Grant admin consent for Saina Cloud Software Solutions” & click Yes.
Note: Only Admin can give this access; if you are not an Admin, then you need to contact your admin person.