To Create Custom Buttons in Model Driven Apps with the help of the Ribbon workbench using JavaScript Code.
High-level resolution steps
- With the help of Library Resource (JavaScript code) the custom button can be added to the home page, subgrid, or form using Ribbon Workbench.
- The button that I have showcased here is to change the status reason of the record on the click of the button.
- On the click of the Custom button “Approve”, the status reason should be changed to “approved,” and on the click of the custom button “Reject”, the status reason should be changed to “Rejected”.
Detailed resolution steps
Step 1
- Write a JavaScript Code in Notepad as Below and follow the rules marked in Yellow and Green: –
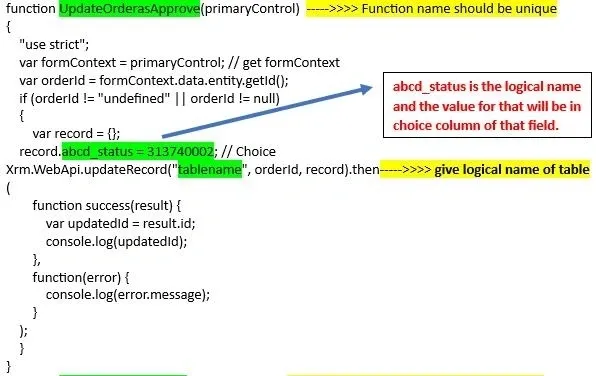
Figure 1 – This code is for the Approve button, and on click of the button, the status changes from “Not Submitted” to “Approved”.
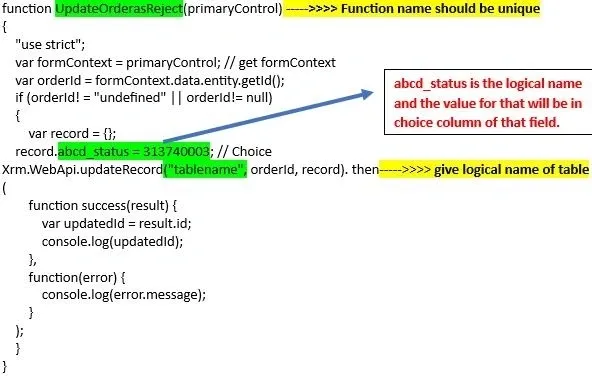
Figure 2 – This code is for the Approve button, and on click of the button, the status changes from “not Submitted” to “Rejected”.
Step 2 –
- Import the JavaScript code into your Solution in a model-driven app as shown below: –
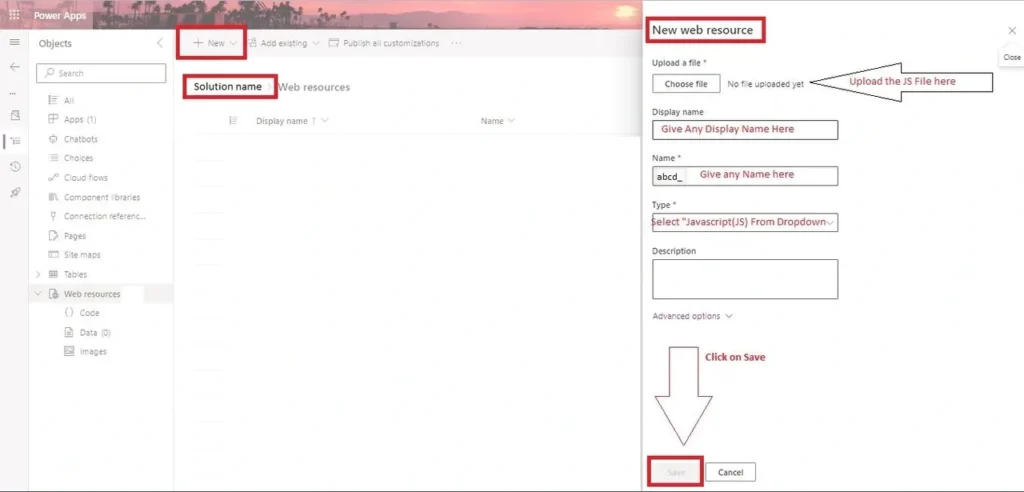
Figure 3 – Uploading a JavaScript File to your Solution in Model-Driven App.
Step 3 –
• Navigate to Ribbon Workbench under Advanced Settings > Customization > Solutions > Ribbon Workbench.
Step 4 –
• Drag and drop the “button” from the Toolbox visible on the left side to the Form area as shown below in the picture:

Figure 4 – Drag and drop a button into the Form Area and rename it as you wish.
• After adding a new button, the properties control opens up and gives the inputs as below:

Figure 5 – Properties control shows up, and then Property ID is auto-generated and gives Label, Alt, Tool tip title as you wish.
Step 5 –
- Add a command in the middle pane below, then the properties show up, and the command property ID will be auto-generated.
- In the library, add the web resource you imported in Step 1.
- Add the Same Function name that you had given in the JavaScript Code.
- Click on Add parameter and select CRM Parameter from the Dropdown
- And under the Value dropdown, select Primary control.
- Refer to the picture below and follow the markings for your convenience:
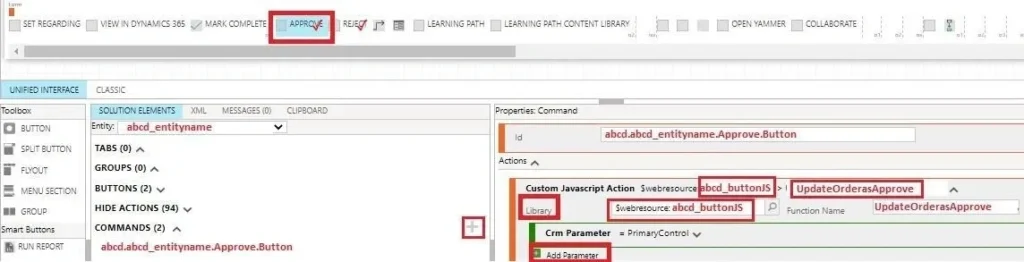
Figure 6 – Command Properties to be inputted as explained in Step 5
Step 6 –
• The Same Steps can be followed for the Reject button (Code given in Step 1) to reject a record (By updating the status as reject on click of that button).
Output
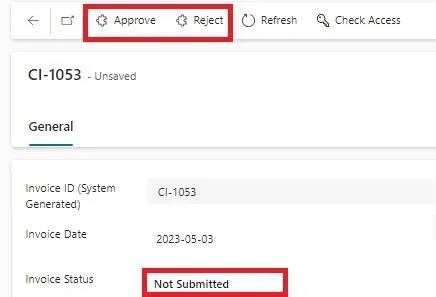
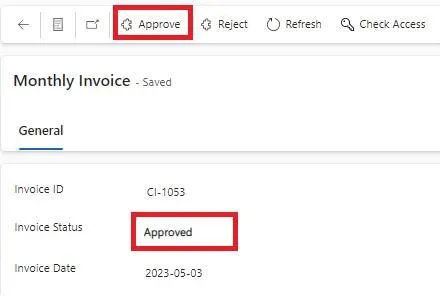
- As you can see, Custom buttons (Approve and Reject) are appearing in the form, and the initial status is in “Not Submitted” State as shown below:
- Now I’ll go ahead and click on the Approve Button, so the status gets changed to “Approved” as shown below for the same record:
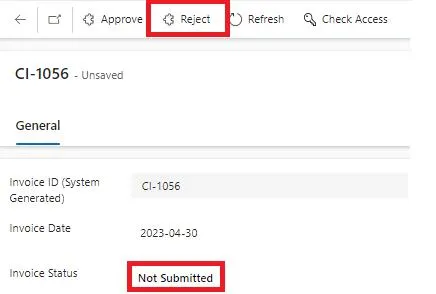
- Now, let’s check the functionality of the Reject Button. The record shown below is in “Not Submitted” state.
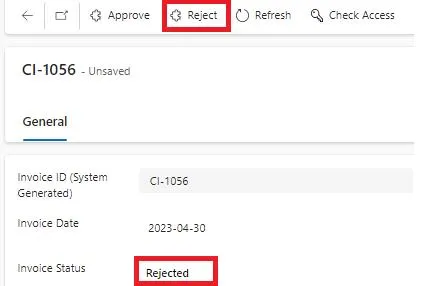
- Now I’ll go ahead and click on the Reject Button, so the status gets changed to “Rejected” as shown below for the same record:
5. Reference links
- You can give security role access for the custom buttons created via Ribbon Workbench.
- The Button can be made Visible to one user and disabled for the other.