How to Move Attachments Between Fields in Power Automate
To move the attachments that are available in the field from one entity to another using Power Automate.
This Scenario is mainly used in the approval stages when a file/image has to be moved from one entity to another.
High-level resolution steps
- With the help of Power Automate, the attachments can be moved from one entity to another.
- Files uploaded in one entity(form) will be available in another entity when the records are sent for approval, without any changes.
Detailed resolution steps
Step 1:
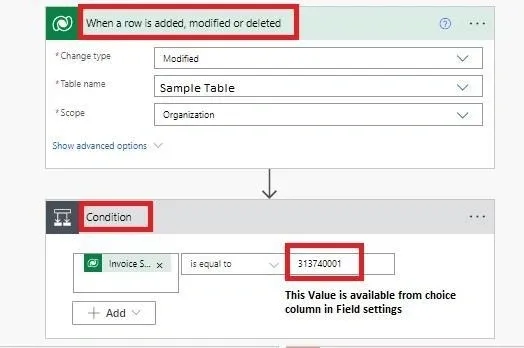
- Select a Dataverse action as shown below in the picture, select the table in 1st action where the modification occurs.
- Which means on the click of a button at the form level, the Invoice status changes its choice based on the condition given in the 2nd Action. Once the status matches the Value, it accepts the condition and continues further.
Step 2:
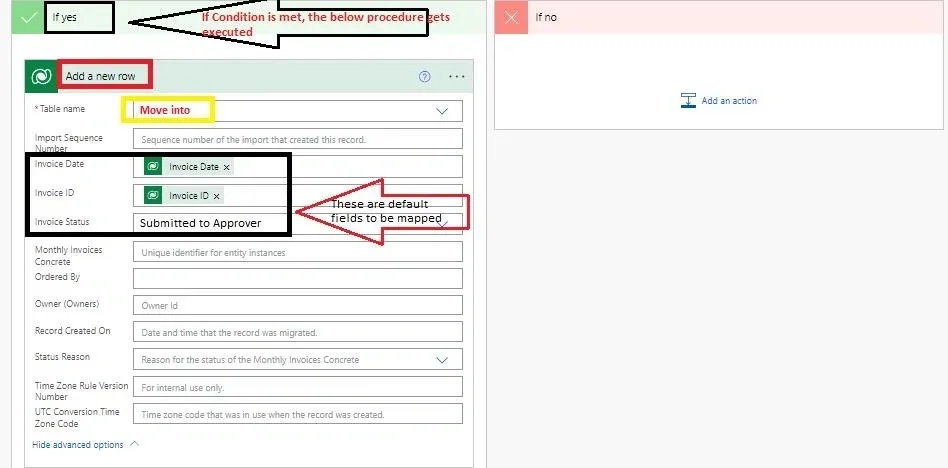
- Once the condition is met, the record from the entity “sample table” moves into another entity named “Move into” as shown in the picture below.
- You can map the default fields from the trigger output options so that the field data present in the “sample table” will be replicated into the “move into” entity.
Step 3:
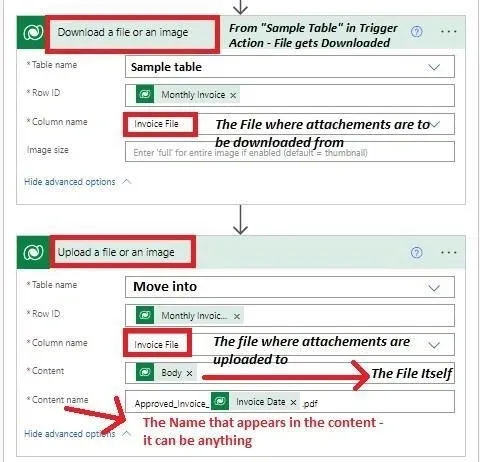
- Next, add the Dataverse actions as shown below. Here, the attachment gets downloaded from the “sample table” entity and is uploaded into the “move into” entity along with the records.
- Row ID in “Download a file or an image” should be mapped with a GUID from the trigger outputs action (1st Action) that should be selected from the dynamic content.
- Row ID in “Upload a file or an image” should be mapped with trigger outputs action of “Add a new row” (From Step 2), which should be a GUID from the dynamic content once again.
- You can refer to the image below for your convenience.
Output
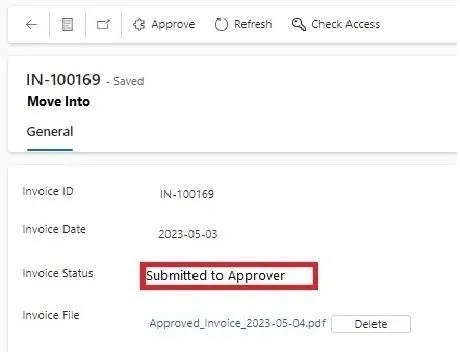
In the Initial stage, the record will be in “not submitted” state, and then you upload your attachment in the “Invoice file” field, and then hit the submit button for the record to go to the Approver for approving this record.
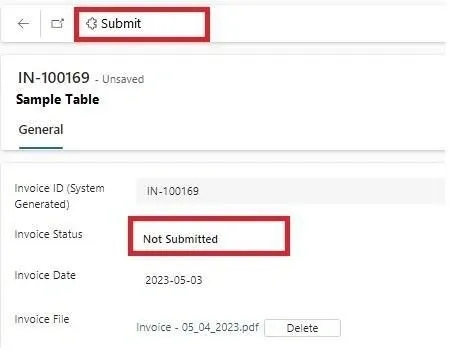
Next, Once the record is moved from “Sample Table” to “Move Into” Entity, the status gets changed to “Submitted to Approver” and the file is also moved into the “Invoice File” Field.