How to Enable Disable Custom Button in Model Driven Apps
We had a situation in model-driven apps where custom buttons created in Ribbon Workbench did not have direct security role access (Enabling custom buttons for one particular user and disable for another).
Though we give only read access via security role for entities, the custom button used to appear, which had no sense or functionality.
Note – This Blog is helpful for custom buttons only that were already created using Ribbon Workbench.
High-level resolution steps
With the help of the Library Resource (JavaScript code), the custom button can be enabled/disabled for the user as you wish.
Calling the Library resource via Ribbon Workbench, where the custom button was already created in your model-driven app.
Detailed resolution steps
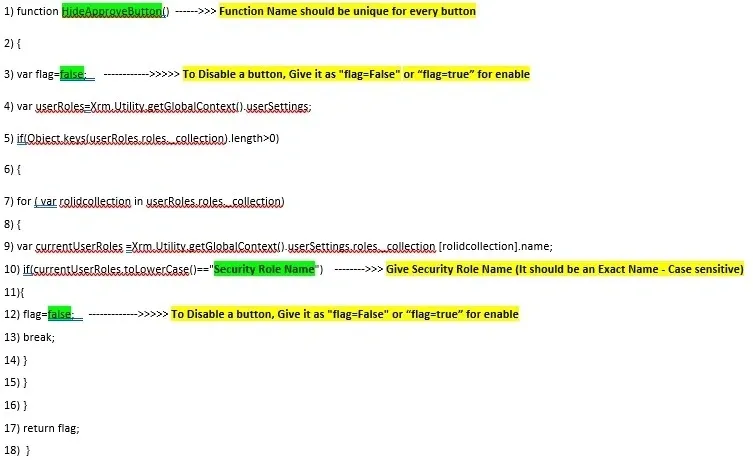
Step 1: Write a JavaScript Code in Notepad as Below and follow the rules marked in Yellow and Green: –
Step 2: Save the file with the extension “.js”.
Step 3: Import the JavaScript Code to your Solution in a model-driven app as shown below:
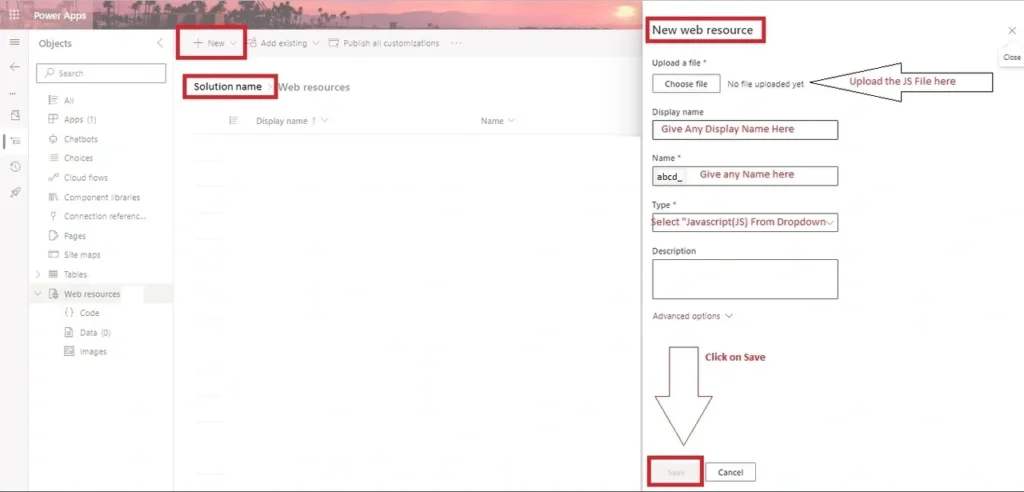
Upload a new web resource as a JS file here, which contains your code, give any display name as you wish, and give any logical name.
In the Dropdown under “Type” selection, Choose “JavaScript (JS)” and finally save it.
Step 4: Open your Ribbon Workbench and Open Solution where the entity was added that contains custom buttons, as shown below.
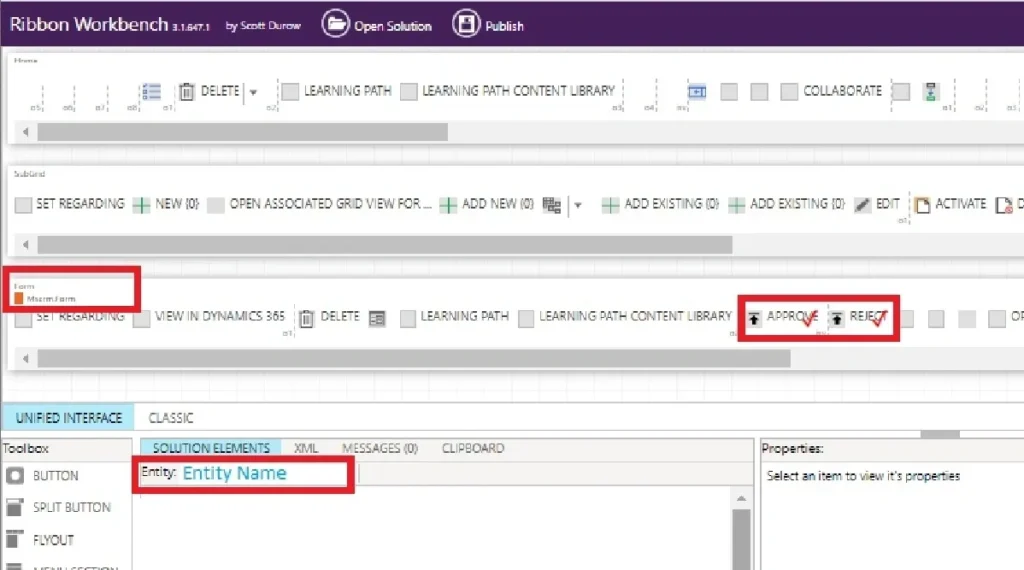
Once you select your entity, the custom buttons that you had created earlier appear.
Select the Custom button you want to enable or Disable.
Once selected, the properties for the button show up.
Straight away, add a new “ENABLE RULE” as shown below:
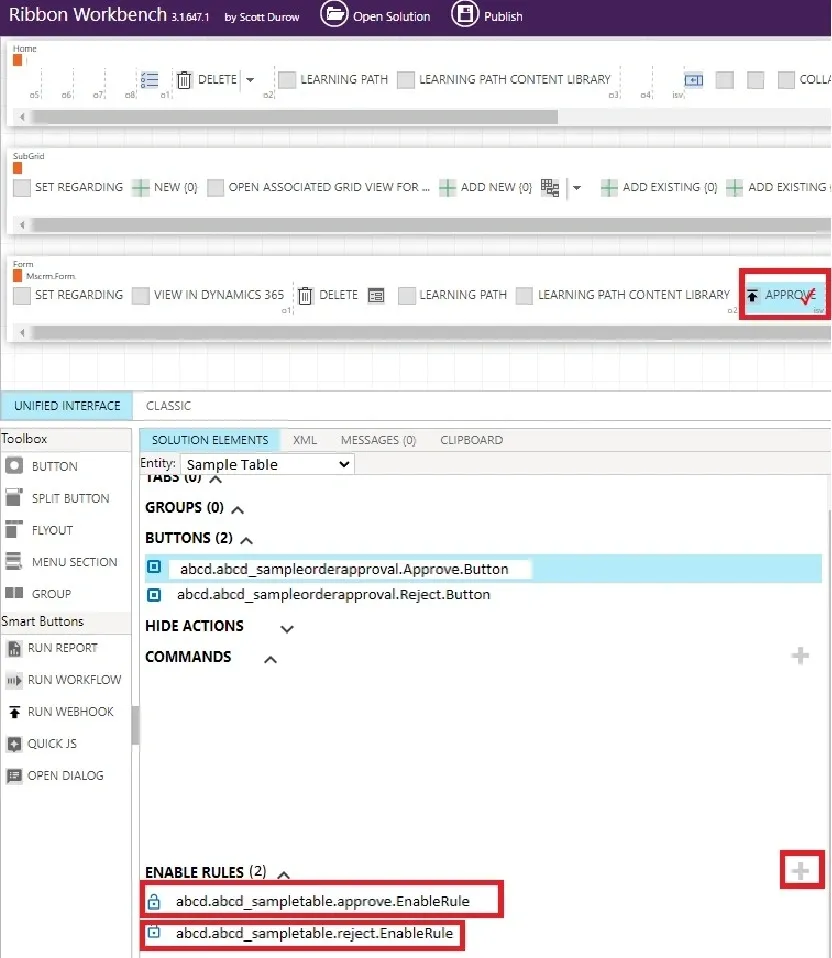
Step 5: After adding an enable rule for one button, you have to click on “ADD STEP” on the right pane, as shown below, and give the same function name that was in your code (HideApproveButton), and upload your JS File that was added earlier in Step 3 under the library option using the search button.

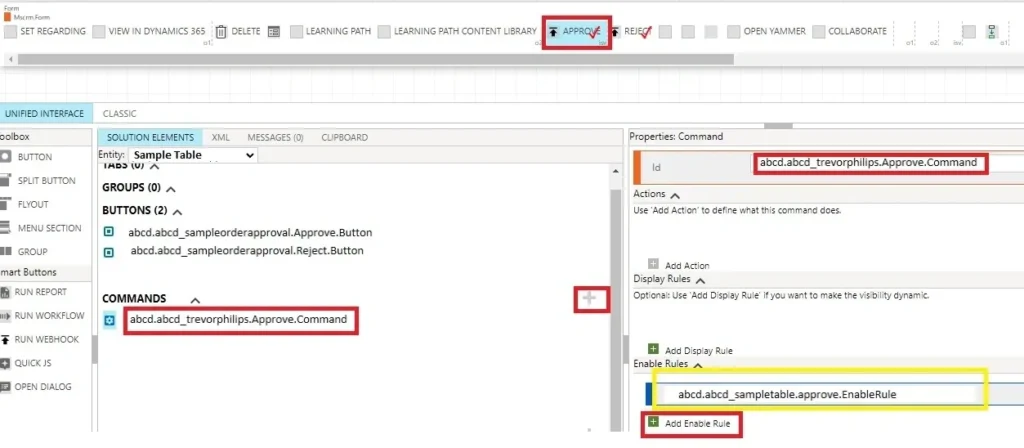
Step 6: You need to add a new Command, and a new Property ID will be auto-generated.
Once added, you need to click on “Add Enable Rule” on the right pane and select the enable rule option in the dropdown that was created earlier in the previous step, named (abcd.abcd_sampletable.approve.EnableRule) as shown below:
Step 7: You can do the same procedure for the Reject button as well. As well as you can write multiple codes in the same JS file with unique function names.
After everything is done, click on Publish in Ribbon Workbench.
Step 8: Custom Buttons (Approve/Reject) is enabled for one Security Role user named “Trevor Philips” when Flag = true is given in the code.