
How to write clicked method for standard forms using event handlers.
Scenario:
When there is a requirement to create an object in standard form and implement a business logic on that object. In my case, I have created the button object, and I have used the ‘OnClicked’ event handler to perform the action.
High level resolution steps
- Create a custom class and add the COC for form level.
- Add the event handler for the same class and write the business logic.
Detailed resolution steps
Step 1: Create a menu item object for the button in the action pane of the form.
I have extended the standard CustTable form and added a button group and I have added menu item object for button inside the group.
Navigation: AOT à CustTable à Create a form extension à Action pane à Button group à Events à ’On Clicked’
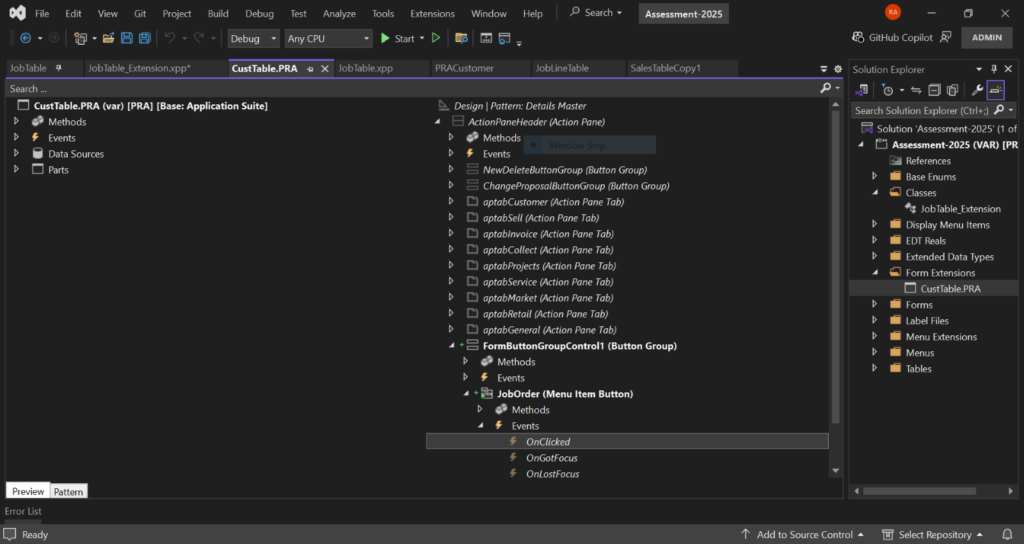
Step 2: Add an event handler for the button through the class extension
Created a class extension to perform form level operation and add the COC for form level, go to the particular form controller and choose the button which I want to add the business logic to and took the event handler from that button.
Note: While creating a class make sure it’s in [ClassName_Extension] format.
Navigation: Create a class extension àJobTable_Extension
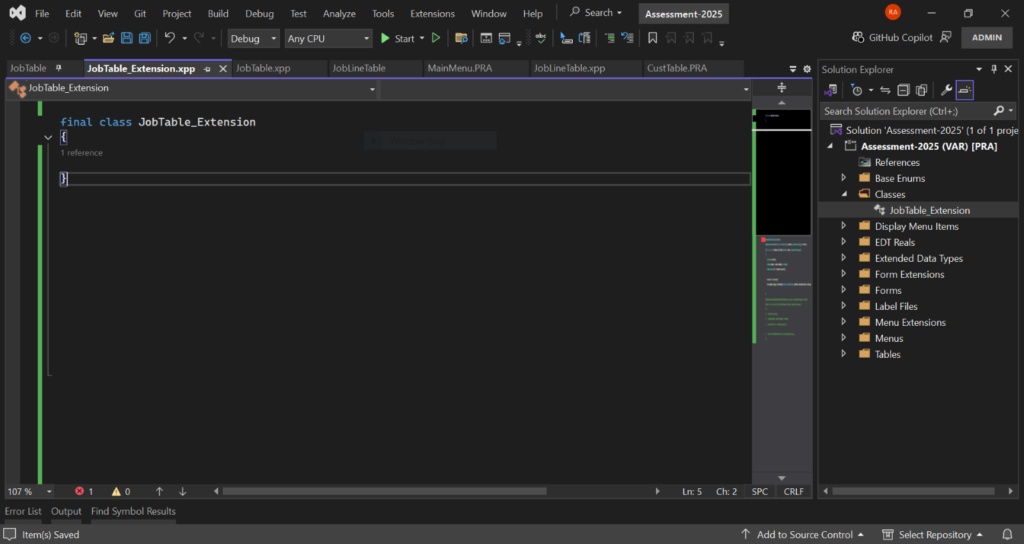
- Add the form level COC for the extended class
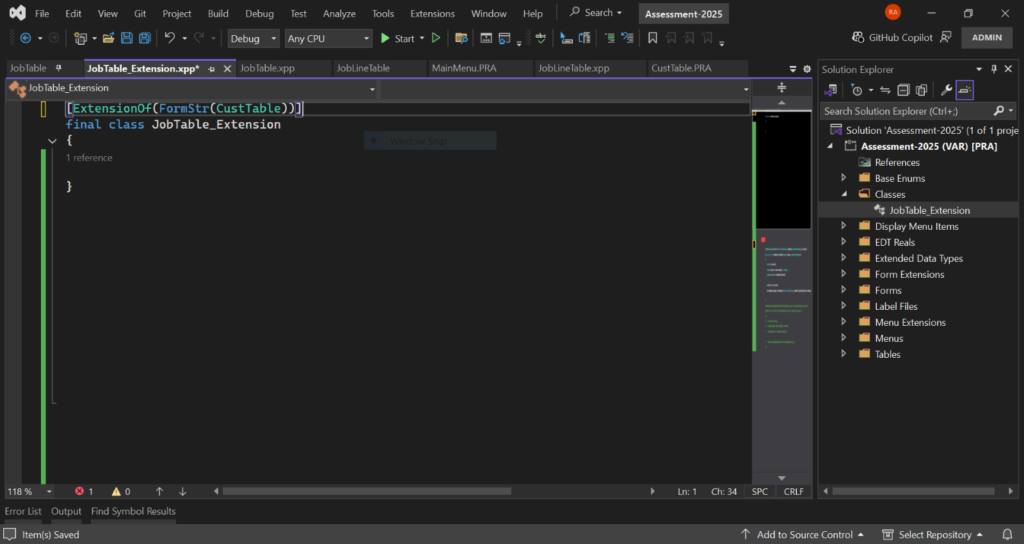
- Copy paste the event handler from the button object and paste it inside the extension class.

Step 3: Add business logic for the event handler
In my case I have written the logic for ’On Clicked’ event, the button should be enabled only for the customers with Customer group ID =10.
Code snippet:
[ExtensionOf(FormStr(CustTable))]
final class JobTable_Extension
{
    [FormControlEventHandler(formControlStr(CustTable, JobOrder),
    FormControlEventType::Clicked)]
    public static void JobOrder_OnClicked(FormControl sender, FormControlEventArgs e)
    {
        CustTable custTable;
        FormRun formRun = sender.formRun() as FormRun;
        FormDataSource fds = formRun.dataSource();

        custTable = fds.cursor();
        fds.formRun().design().controlName(formControlStr(CustTable,
        JobOrder)).enabled(custTable.CustGroup == '10');
    }
}
Code Explanation :
- custTable : Table buffer for CustTable(Standard table)
- The sender represents the control or element that triggered the event (such as a button click or form interaction).
- The formRun() method returns the FormRun object associated with the form, which allows access to the form’s structure and controls.
- as FormRun casts the object into the FormRun type for easier manipulation of the form controls.
- formRun.dataSource() retrieves the FormDataSource associated with the form.
- This FormDataSource object represents the data source bound to the form, such as a record or set of records being displayed or edited (in this case, likely related to the CustTable).
- fds.cursor() gets the current record (or row) from the DataSource.
- This record is assigned to the custTable variable, and it is now an instance of the CustTable table with its current field values.
- fds.formRun(): Returns the FormRun object associated with the form.
- design(): Accesses the form design, which includes all the controls defined in the form layout.
- controlName(formControlStr(CustTable, JobOrder)): This retrieves the control associated with the JobOrder field in the form.
- formControlStr(CustTable, JobOrder) is a macro that returns the name of the control associated with the JobOrder field on the form
- enabled(custTable.CustGroup == ’10’): Sets the enabled property of the JobOrder control.
- If the CustGroup of the current customer record (i.e., custTable.CustGroup) is equal to ’10’, the JobOrder button is enabled (true).
- If the CustGroup is not ’10’, the JobOrder button is disabled (false).
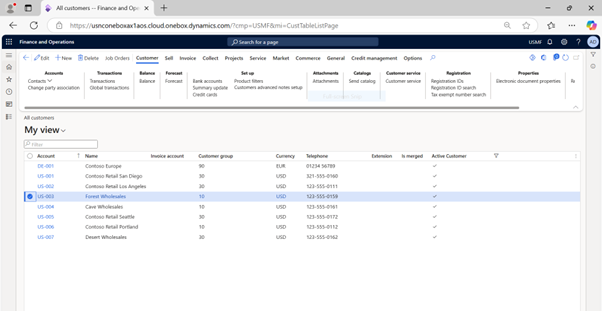
Output windows
In this scenario I have added the condition so that, button should be disabled for customers other than CustomerID = ‘10’.
Navigation: Account Receivable → All Customers → Click on any one of the Customers
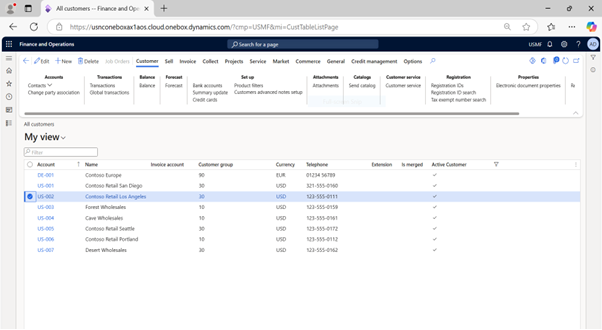
In this scenario I have added the condition so that, button should be enabled for customers CustomerID = ‘10’.
Navigation: Account Receivable → All Customers → Click on any one of the Customers
Conclusion
To add custom functionality to a standard form in Dynamics 365 for Finance and Operations, creating a button and using the ‘OnClicked’ event handler is a common approach.
- Adding the Button: The button is added to the form through the form’s design in the AOT.
- Implementing Logic: The ‘OnClicked’ event handler is used to define the action to be performed when the user clicks the button, such as updating records or running calculations.
- Business Rules: The logic should follow business rules and validations to ensure the correct action is taken.
Using this method allows us to trigger specific actions via the UI, while ensuring the backend
