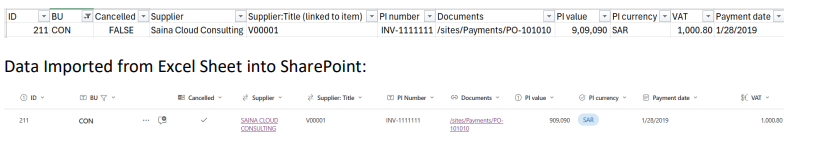
- There is no direct way to import an excel sheet into SharePoint lists.
- If you want to migrate from one list to another or from Tenant to Tenant, these kinds of Scenarios are useful
High level resolution steps
- Create a Power Automate flow and upload the excel sheet you want to import to SharePoint.
- Make sure the field mapping is not directly mapped from excel to SharePoint list in Power
Automate. - Make Sure for the lookup fields to map, you already have the lookup list ready with you and the Primary column’s data is same as in Excel Sheet.
Detailed resolution steps
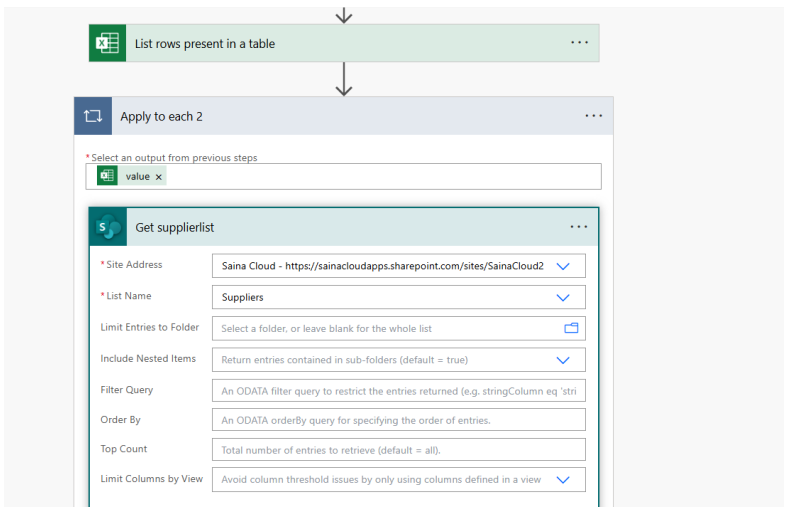
Step 1: Store the excel sheet in OneDrive and get it into Power Automate with a Manual Trigger or use an action called “List Rows present in Table”.
In my case I have used it in the following way:

Step 2: Get the lookup SharePoint List in the next step as shown below:
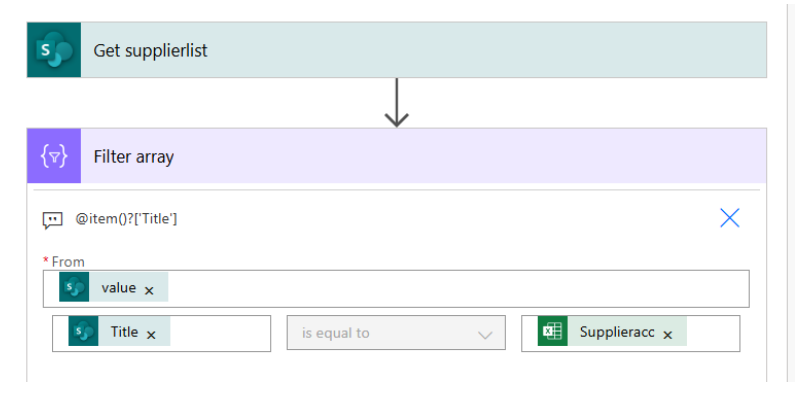
Step 3: Add a filter Array to match the lookup field from SharePoint and Excel Sheet:
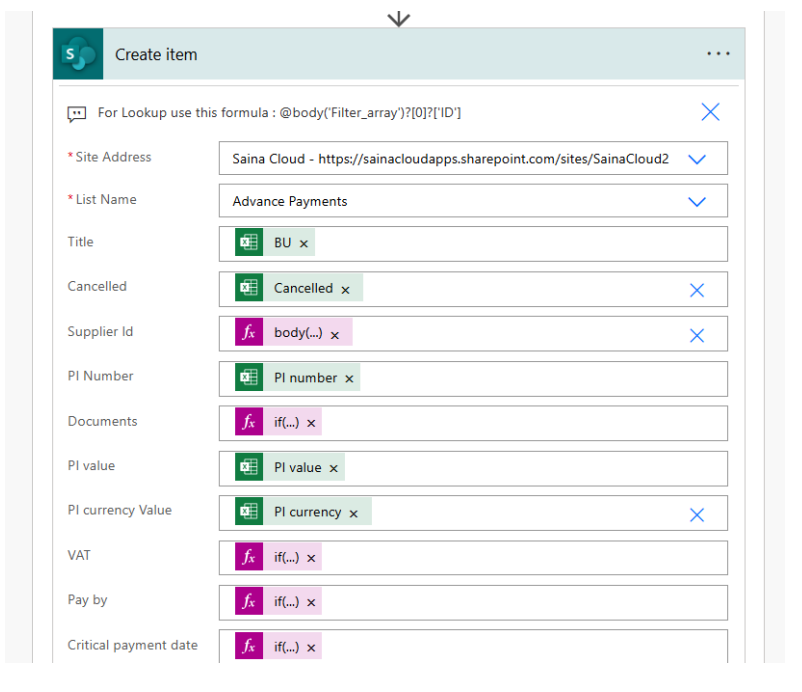
Step 4: Add a create item action to create new rows into SharePoint:
Use the below formula methods to map for various kind of Datatypes:
Lookup sample –
| @body(‘Filter_array’)?[0]?[‘ID’] |
String field sample –
| @{items(‘Apply_to_each_2’)[‘BU’]} |
For Making Null Checks for String Fields –
| if(empty(items(‘Apply_to_each_2’)?[‘Documents’]),null,items(‘Apply_to_each_2’)?[‘Documents’]) |
For Date Fields along with null check:
| @{if(empty(item()?[‘Revenue Month’]),null,formatDateTime(item()?[‘Revenue Month’],’MM/dd/yyyy’))} |
For Choice-Set Options:
| Use Dynamic content from Excel sheet itself |
For Currency fields:
| Have the field type as currency, but while importing just map the field to Sharepoint action |
Attached the below screenshot for your reference:
Output
Sample Excel Sheet: